Campus Setup
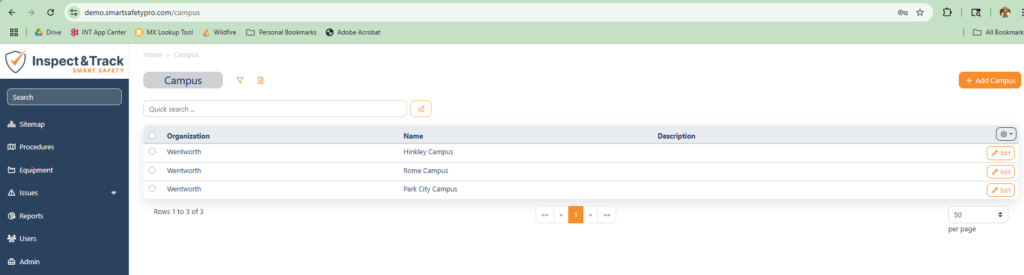
The Campus screen is a very simple screen that lets you define the name of each campus and add a description of the campus. The default campus when you first get your system is named Main Campus. You are welcome to rename that, and add as many campi as you need. This feature is very important once users begin syncing with the mobile app.
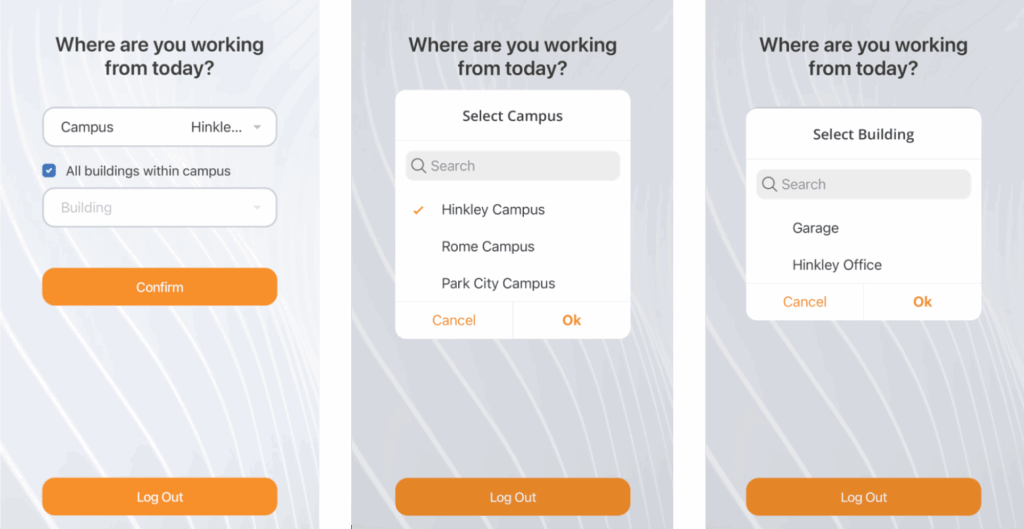
When a user logs in and has permissions to see multiple sites, they will be asked to make a selection of where they will be working. This option is available to help you reduce the size of the sync you need to make in cases where your company may have hundred of sites where your inspection team works, or multiple facilities with lots of equipment and images. You will first select the campus you want to work at (second picture). If that campus has multiple sites, you can choose to leave the “All buildings within campus” button selected and you will sync to all sites associated with that campus, or you can deselect that box and click on the dropdown (third picture) and you will see a list of sites and you can select a specific one.
So while the campus screen is simple, it is powerful, and you always need to have your campi defined and make sure your sites are assigned to a campus so that they are visible when your users sync. Incorrect configuration of your campus and site assignments is a leading cause of visibility issues for site and equipment when performing inspections and procedures.