Template Setup
The template is the powerhouse of the the inspection system that defines the questions which will appear on your inspection. Templates have various types that define which workflow the template belongs to. You can also assign templates to a division so they are only available for use by members of those divisions.
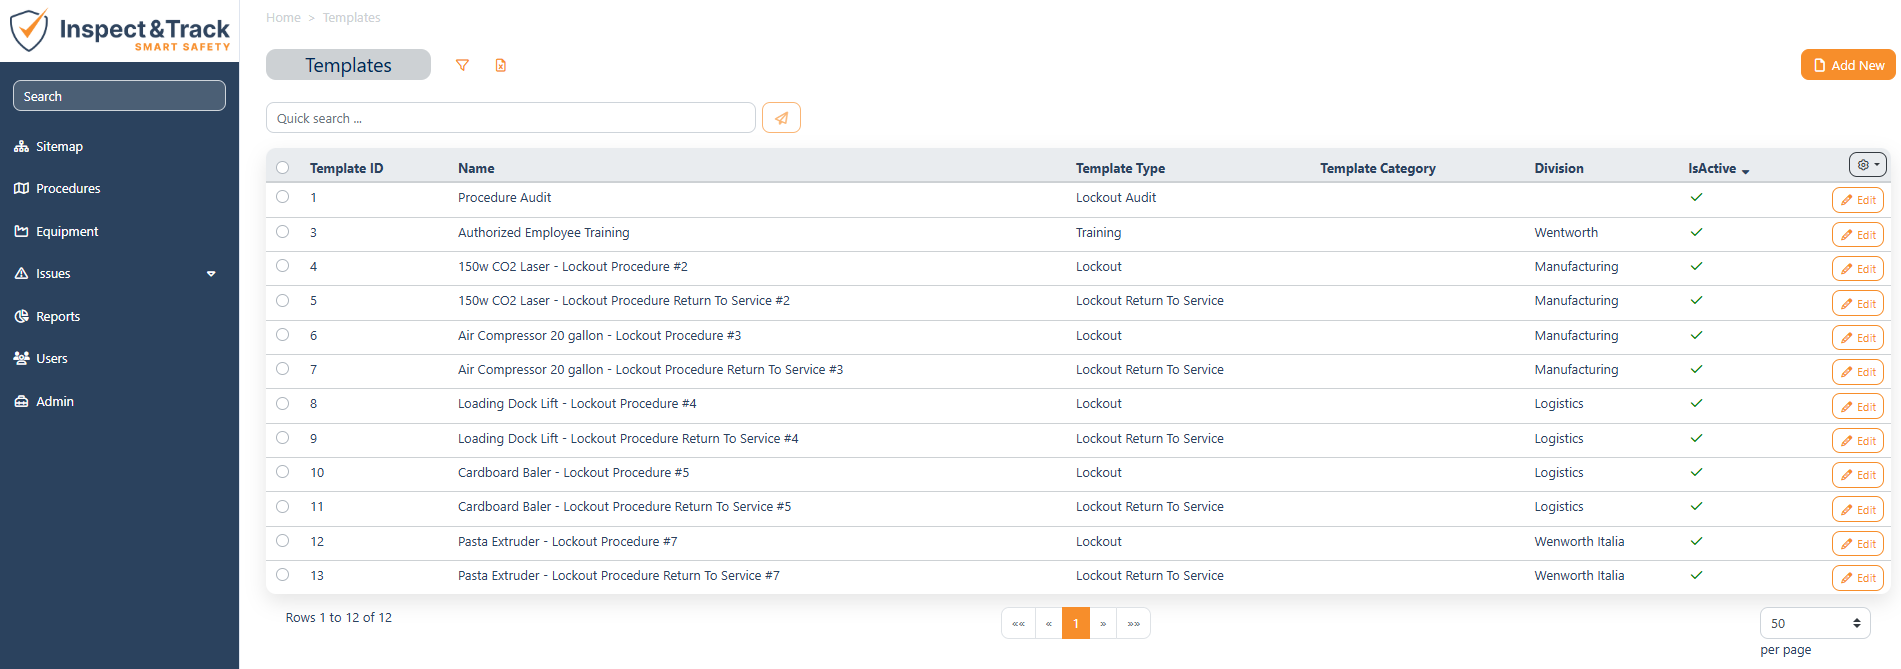
The Template Record Screen sets all the details on the template and allows you to add Items and Item Sets. Items are individual questions, and Item Sets are groups of questions. Configuration of those items will be addressed in a separate article.
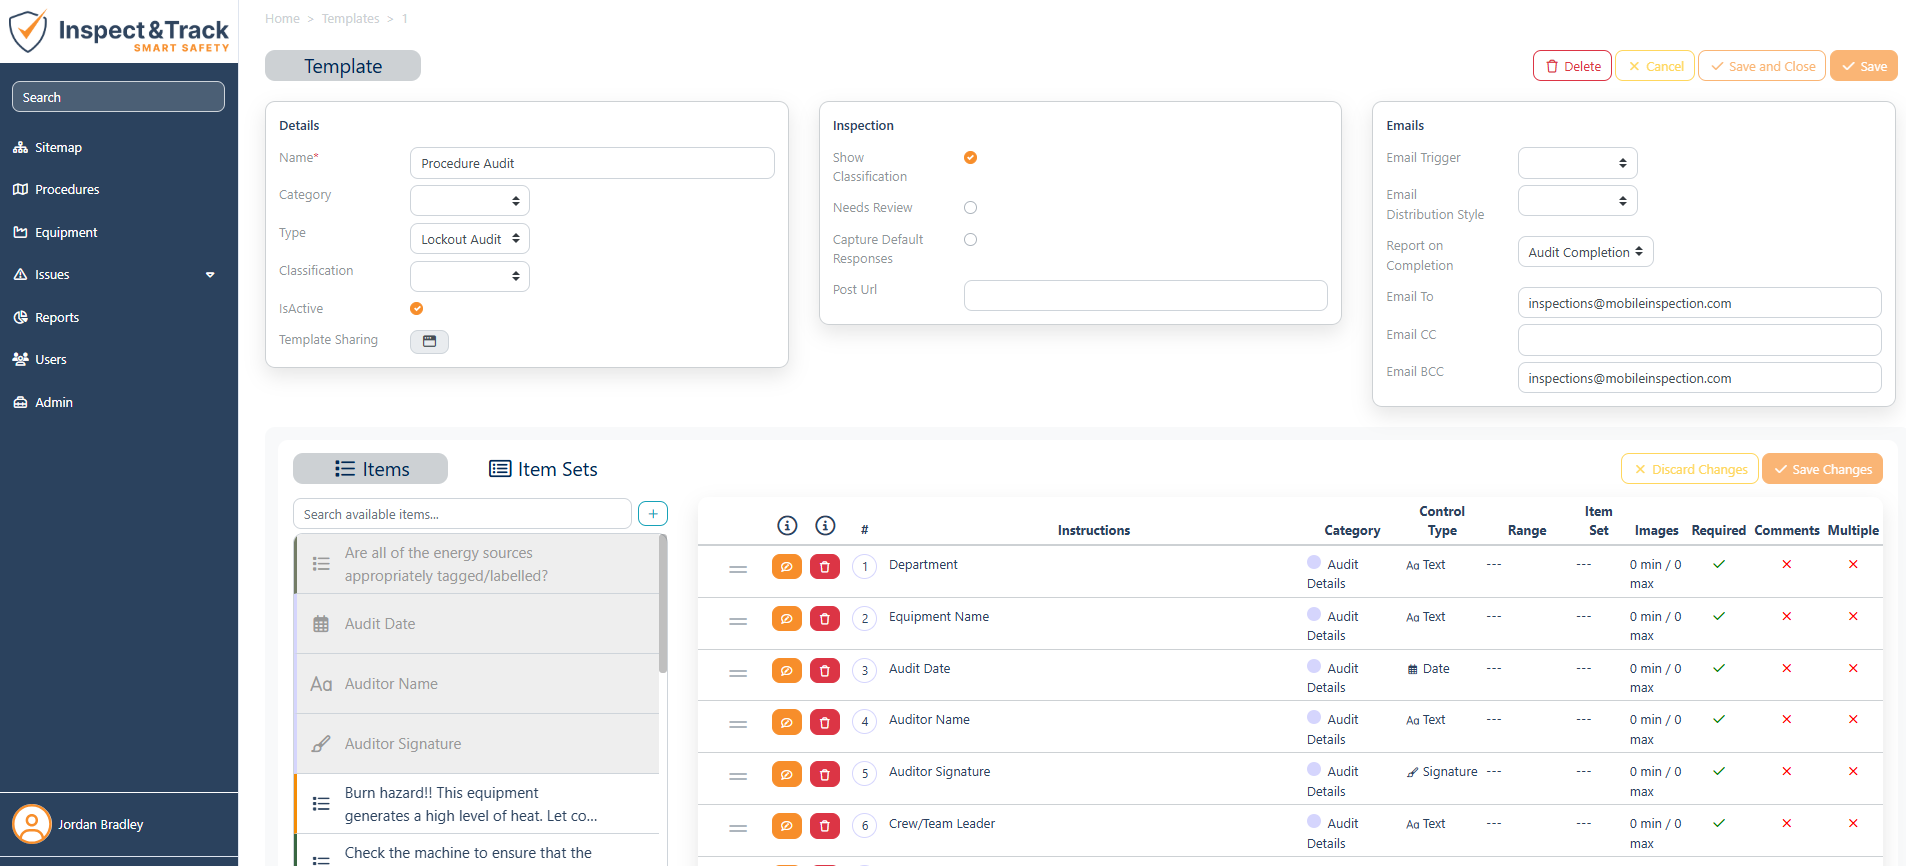
Details Section:
Name: This is the name of the template and will be listed every time an inspection is performed as part of the inspection name.
Category: By default, these are blank, and you can add template categories as you see fit to help organize and group your templates.
Type: Each template type applies to different workflows and controls different features in those workflows.
- Compliance – this template type is tied to a Compliance codebook.
- Component – this template type is for inspecting the components of large systems and requires the equipment to be set up with component structure.
- Inventory – this template type is for work at the equipment or component level depending on your active modules and configuration.
- Lockout – this template type is for locking out equipment as part of the Lockout Tagout workflow. Component structure cannot be changed as it is part of the procedure approval process.
- Lockout Audit – this template type is for the periodic inspection of LOTO procedures.
- Lockout Return to Service – this template type is the opposite of the Lockout template and brings equipment back into service.
- Standard – this template type is for a standard site level inspection. This is the core inspection type available in every module.
- Tour – this template type is for inspections scanning specific locations to achieve completion.
- Training – this template type is for tracking training responses. Items/Questions can also be marked as training so that you can track on the job training as other work is happening.
Classification: This feature is related to scoring and is currently related to custom site inspection workflows. Please contact the support team before using this field.
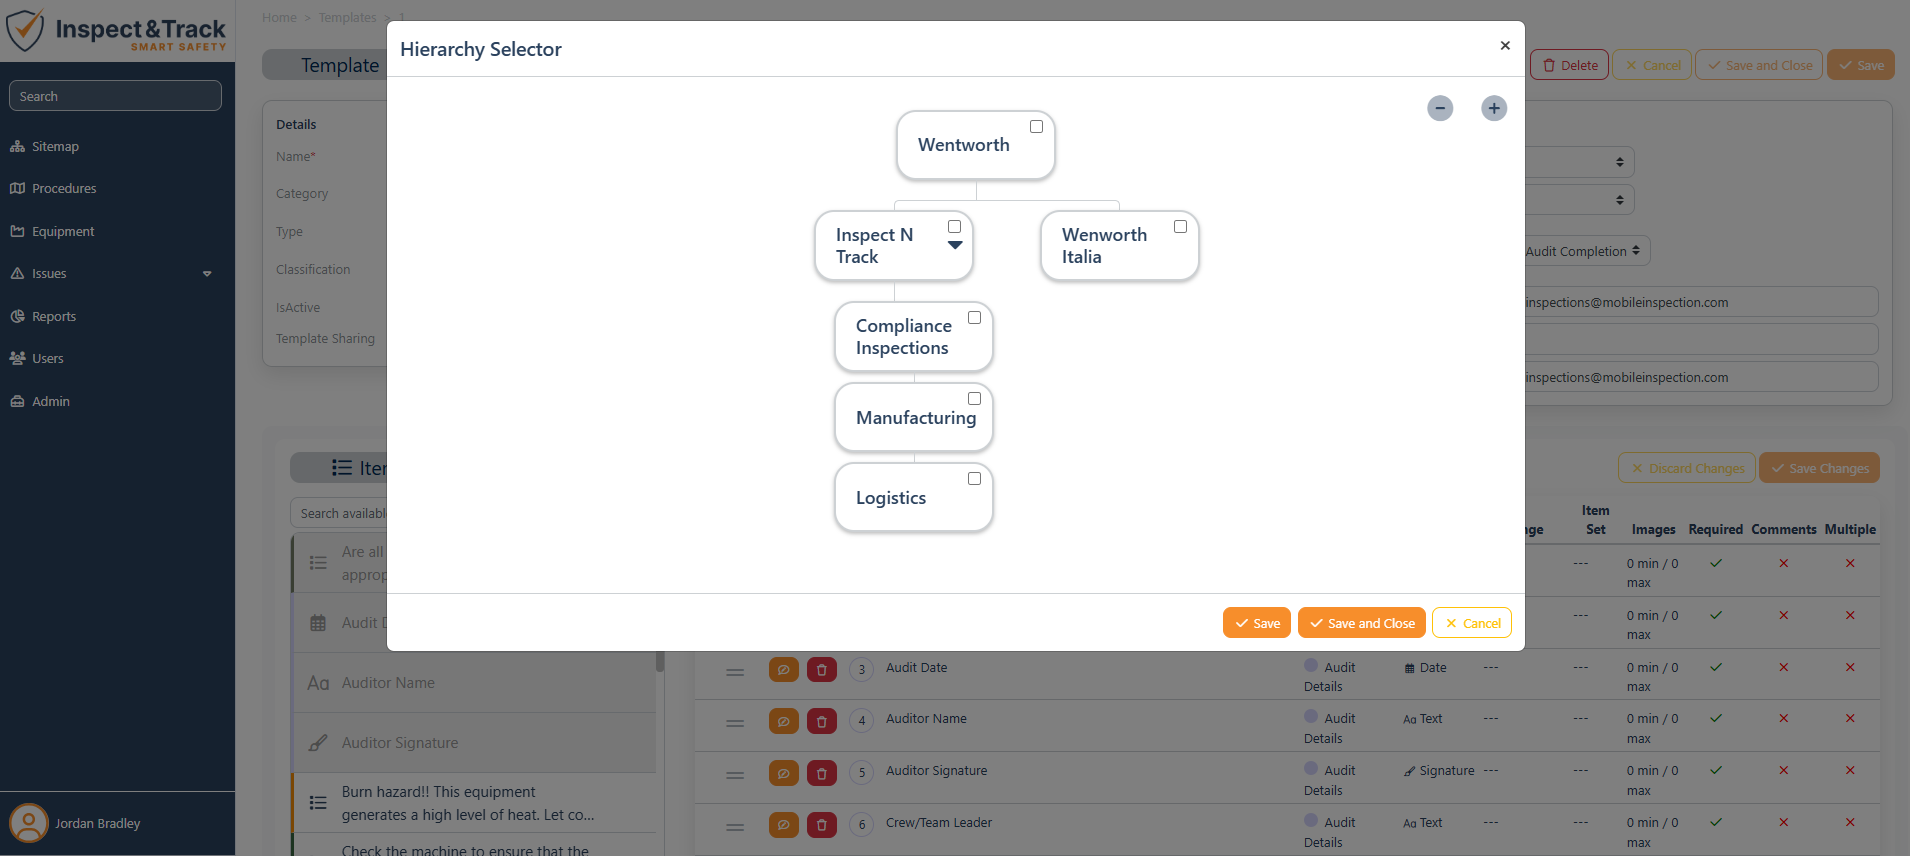
Template Sharing: This launches a pop up hierarchy selector that shows the divisional hierarchy you have built in your system. Selecting a node assigns the template to that divisional hierarchy node so that it is available to only that selected division and any below the selected node. Leaving it blank (as pictured below), or selecting the highest node, makes the template available everywhere.
Inspection Section:
Show Classification: This selection determines if additional classification question appears on each question in the template. Contact the support team for configuration before using this feature.
Needs Review: If selected, it means that the inspection responses must be reviewed before the inspection can be marked complete. If not selected, the inspection will be marked as complete when all the questions are answered.
Capture Default Responses: If selected, the system will store general, reusable responses (meta data only – not adjudicated information that requires a user decision) in a table in order to copy them later during the assignment of future inspections at a given site and division. Examples of this include questions on components (like confirming model number and serial numbers to make data entry on reinspection much more efficient) or site supervisors or project details for efficient reinspection. Default responses can never be set on response that require a value decision (like yes/no; pass/fail).
Post URL: This field is for special functionality after an inspection is completed and should only be filled by the support team.
Email Section:
Email Trigger: Leaving this blank will not send any emails. There are two options for email triggers – either send an email when the inspection status changes to complete, or to aggregate all completed inspections for a day into a single email report at the end of the day.
Email Distribution Style: This defines the format type for the email reports.
Report on Completion: This defines the report template that will be used to display the data from the completed inspection.
Email Fields: These fields define the recipients of emails when the triggers and details above are set. You can set multiple emails by separating emails with commas. If you have a large organization, it is always recommended to use a group email and manage distribution within your internal system to minimize your work as your team changes and grows.